
We notice that each PrestaShop store sends a handful of emails each week without anyone thinking about those emails: order confirmations, shipping notices, password resets, account welcomes. Then a customer forwards one of these emails asking, “Hold on, is this really from you?” The template still has that classic, years-old PrestaShop look, but somehow the email system is now the part that feels modern and well thought out.
Customizing PrestaShop email templates isn’t really one task. It’s two problems that just happen to look alike. One is about how an email appears, and the other’s about when and why the email gets sent in the first place. Most tutorials only cover the first one. This article covers both, because a store owner who only touches the visual template will eventually hit a wall the moment they want a custom notification, say, a “your backorder just got restocked” email that PrestaShop simply doesn’t send out of the box.
1.0 How PrestaShop Actually Handles Emails
Modifying the templates means altering the logic’s results without touching the logic itself.It would be helpful to have a certain understanding of the structure of things before making any changes, since PrestaShop divides its email processing functionality into two distinct layers located in entirely different locations.
The first layer you will see when working in the back office. Each email that PrestaShop sends is important and valuable. This could be an email that confirms an order, gives you an invoice, helps you to reset your password, or confirms your subscription to the newsletter. There is an HTML file as well as a text file for each of these emails depending on the language. These versions are saved as files for each language. These files are stored inside the mails folder of your installation.
The logic layer is code. In PrestaShop, some PHP code inside the core or a module calls the Mail::Send() method. This method is the way that PrestaShop 1.7 and 8.x send transactional emails whenever an event happens. Newer Symfony‑based admin flows. While some of these modules utilize their own mail services, there is nothing like a service for wrapping the Mail::Send() method in all the core modules. This particular Mail::Send() method takes care of the decision-making process concerning the loading of the template file, the variables required, and the person who would get the email, be it an order, status, or password change. Changing the template file would affect the output of this logic, not the logic itself.
Mail::Send() will need the following parameters:
- $id_lang
- $template (name of the file, excluding its extension)
- $subject
- $template_vars (array with variables for replacing the ones in the template)
- $to
- $to_name
- $from
- $from_name
and other potential parameters like $attachment.
It also supports SMTP mode and forces a custom template path as well as $id_order. In use, most of the effort in creating a custom email module comes down to building the $template_vars array correctly and making sure the $template points to the correct file. The Mail::Send() method call rarely needs anything more than that.
This distinction matters because many store owners run into confusion. They say, “I edited the template, but nothing changed” or “How do I add an automated email?” These problems come from mixing up the two layers.
1.1 The Template Layer in Practice
To edit the appearance of a template, the back office is the place to start.
- Click on Improve > International > Translations (this path applies to PrestaShop 1.7 and 8.x, but for PrestaShop 1.6, use Localization > Translations). Choose Modify translations and then select Email translations as the type of translation.
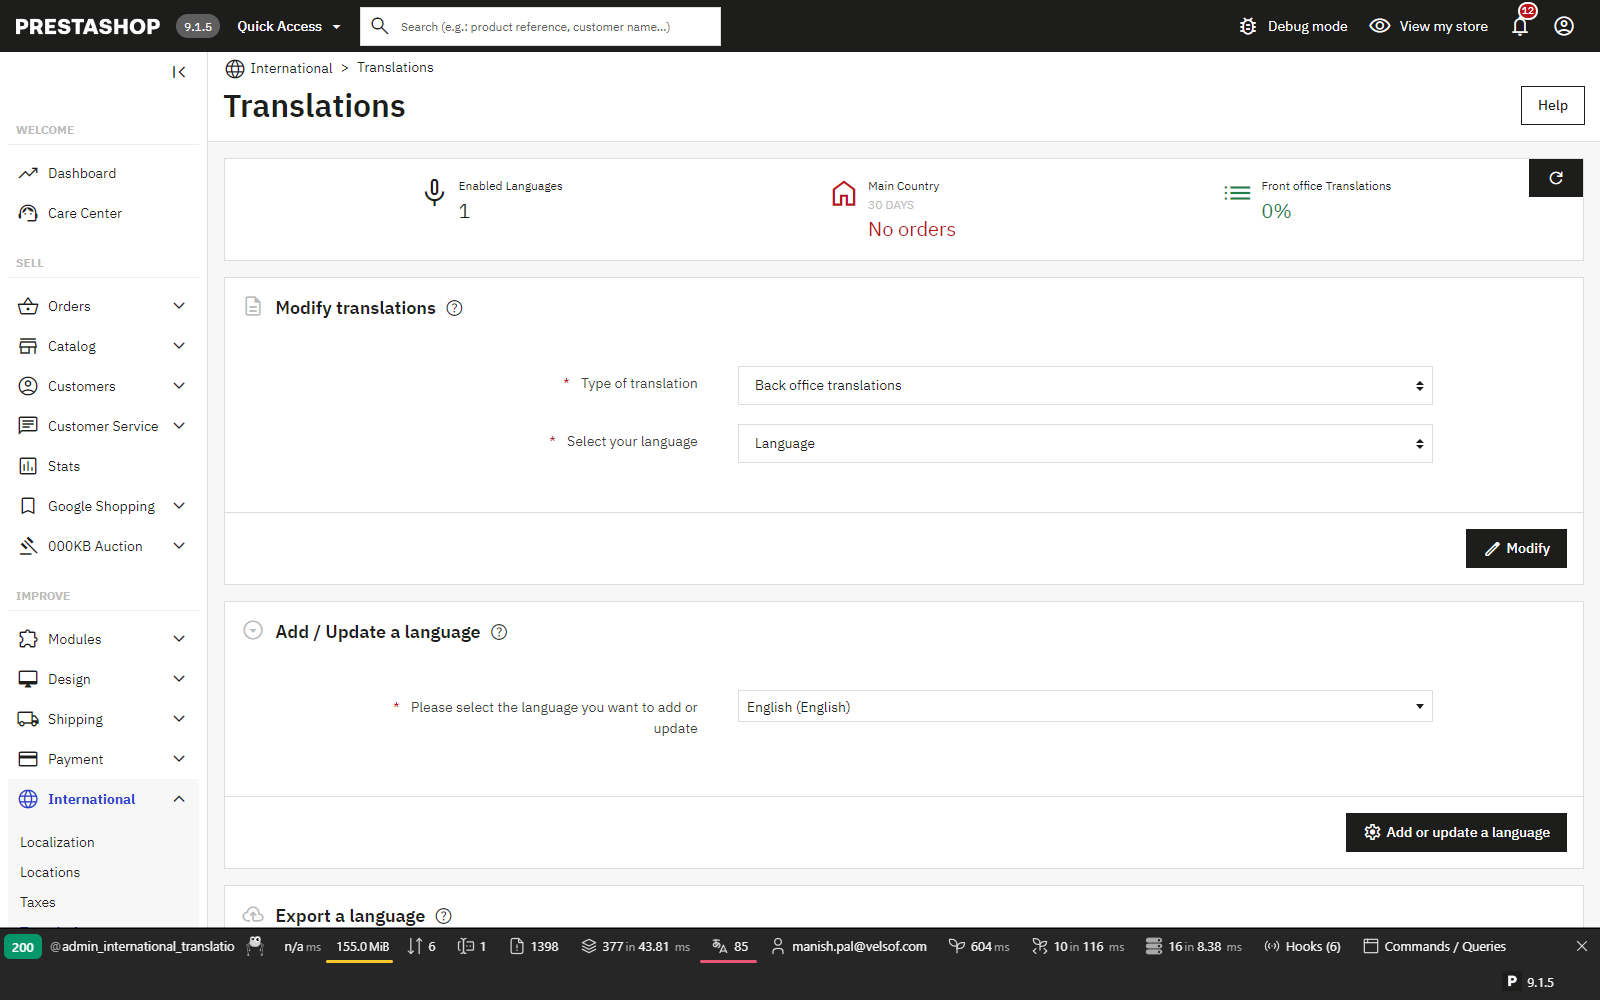
The Translations page under Improve > International
- Choose whether you’re editing the Body or the Subject.
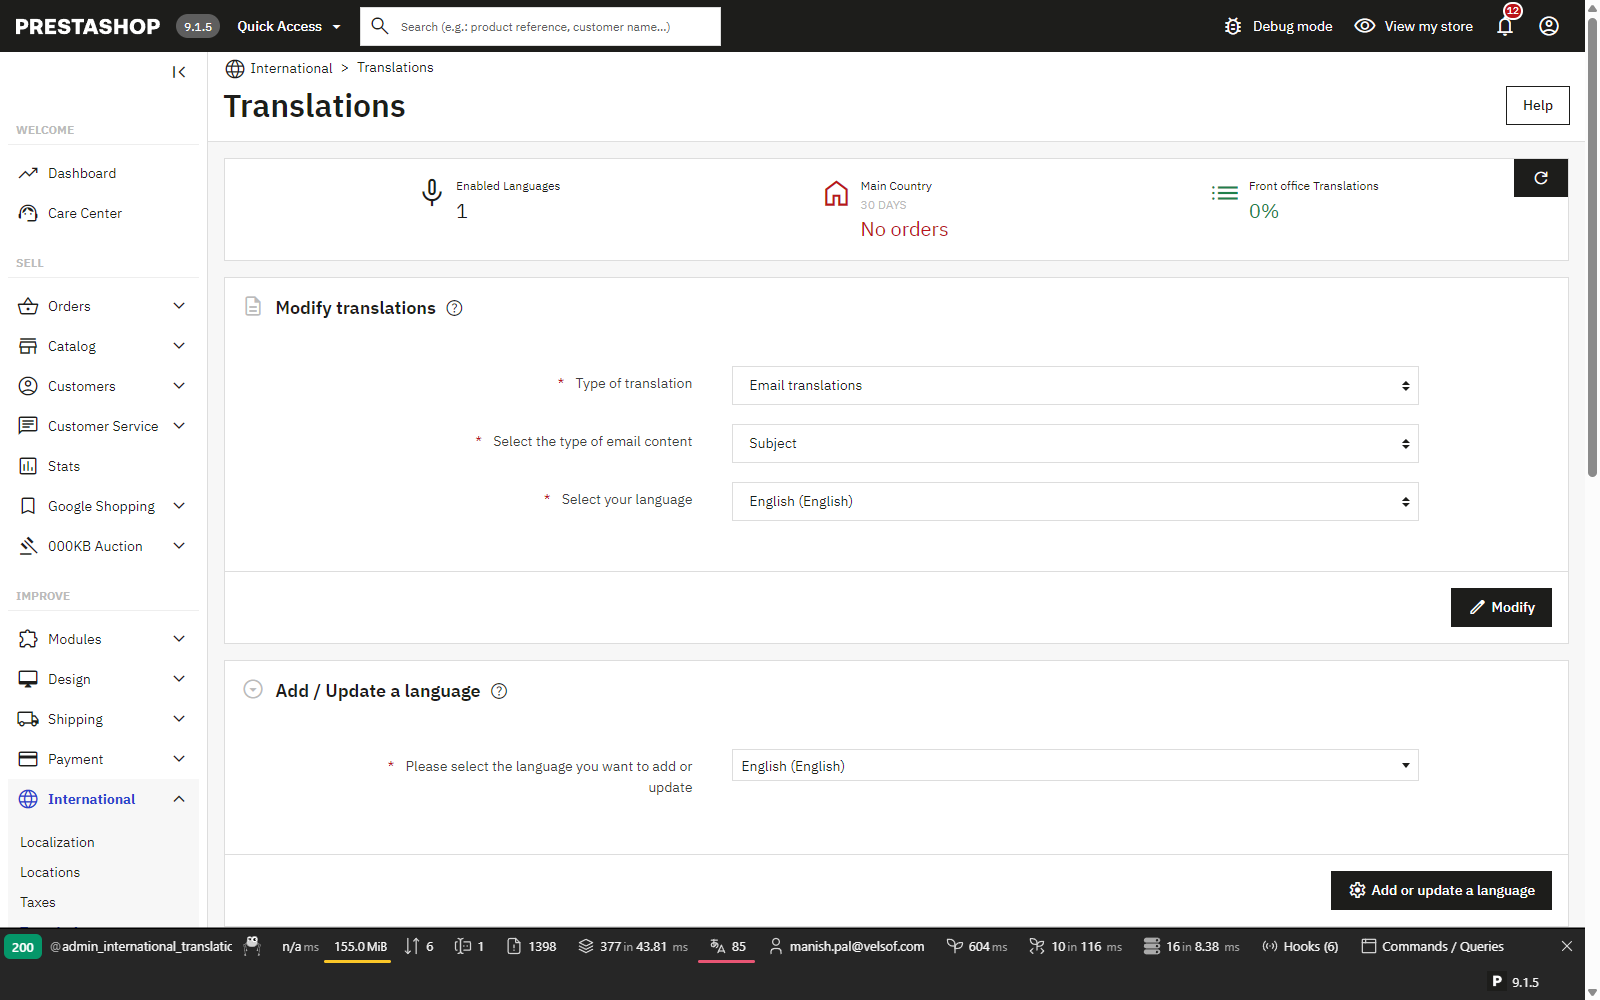
Email translations type with Subject content selected
- Pick the theme, usually Core (no theme selected), unless you’re running a theme-specific override and the language you want to edit.
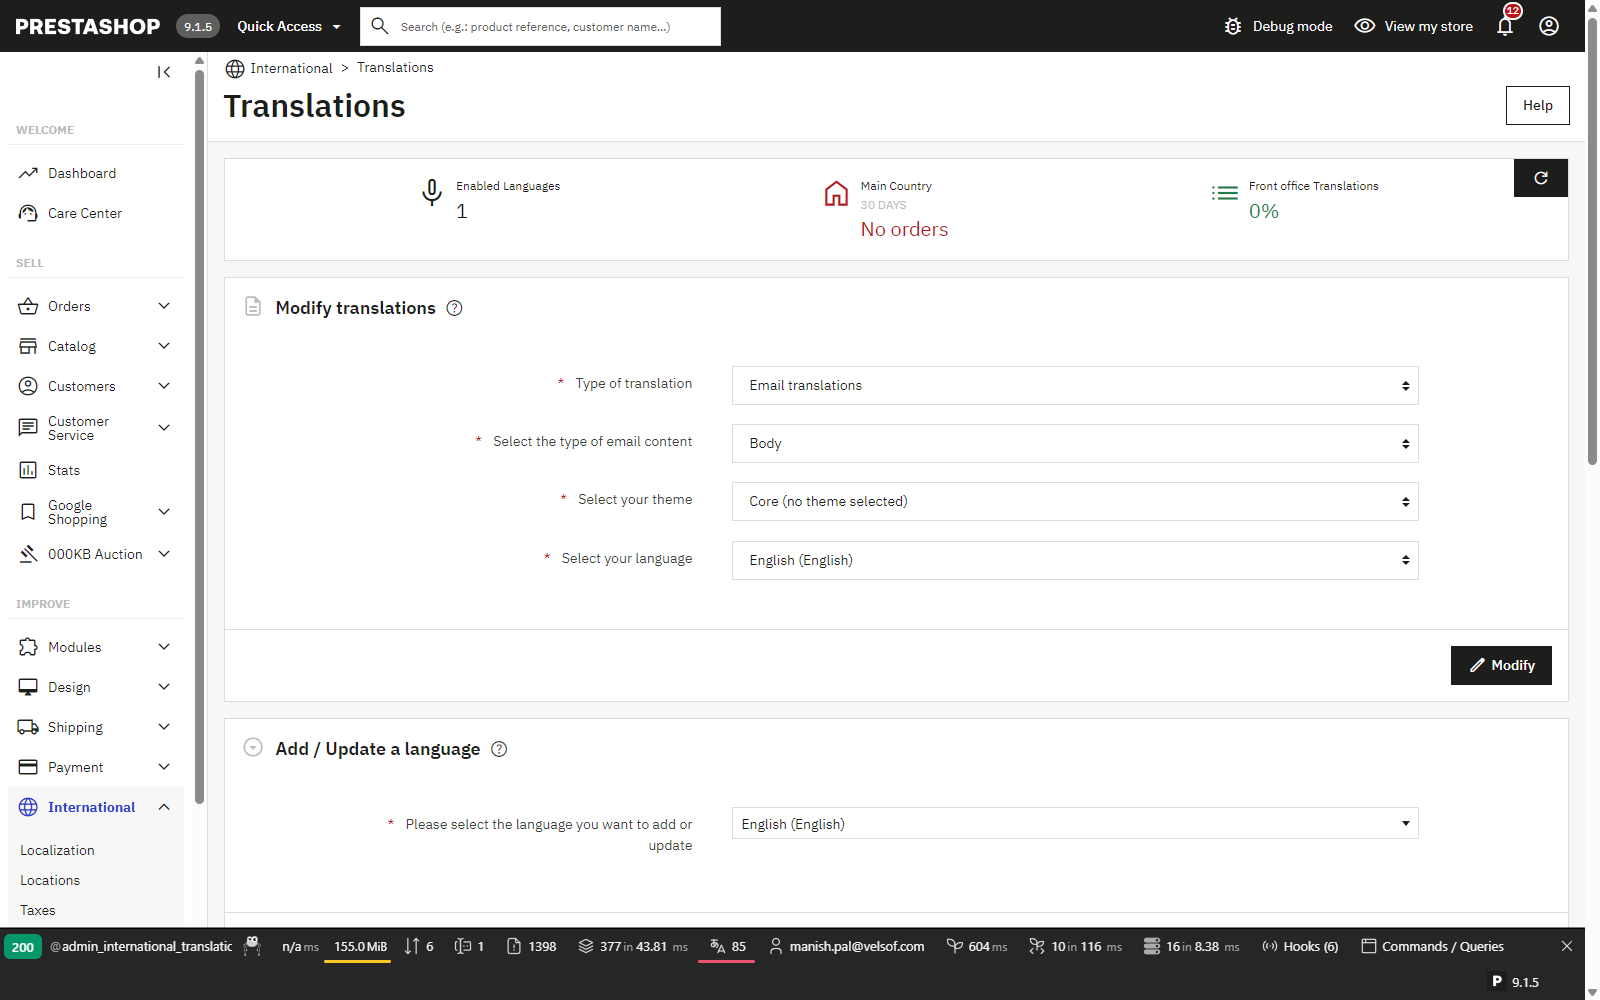
Email translations set to Body, with theme and language selected
- Click Modify, choose the specific email, like account creation or order confirmation, from the list.
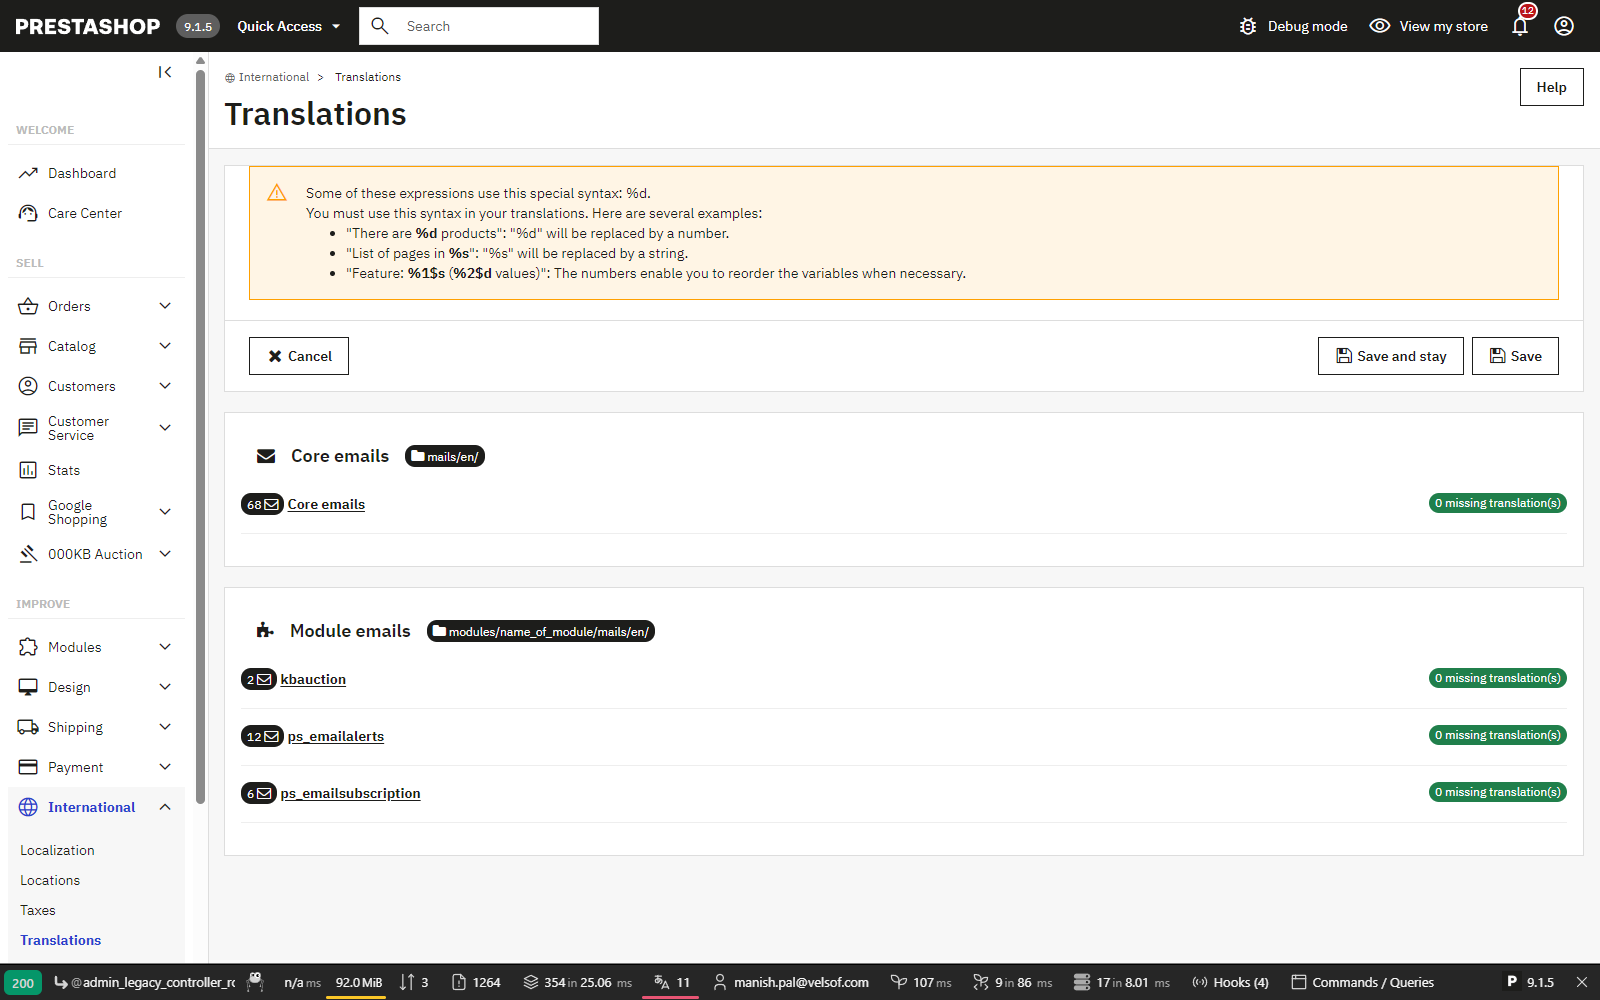
Core emails and module emails list shown after clicking Modify
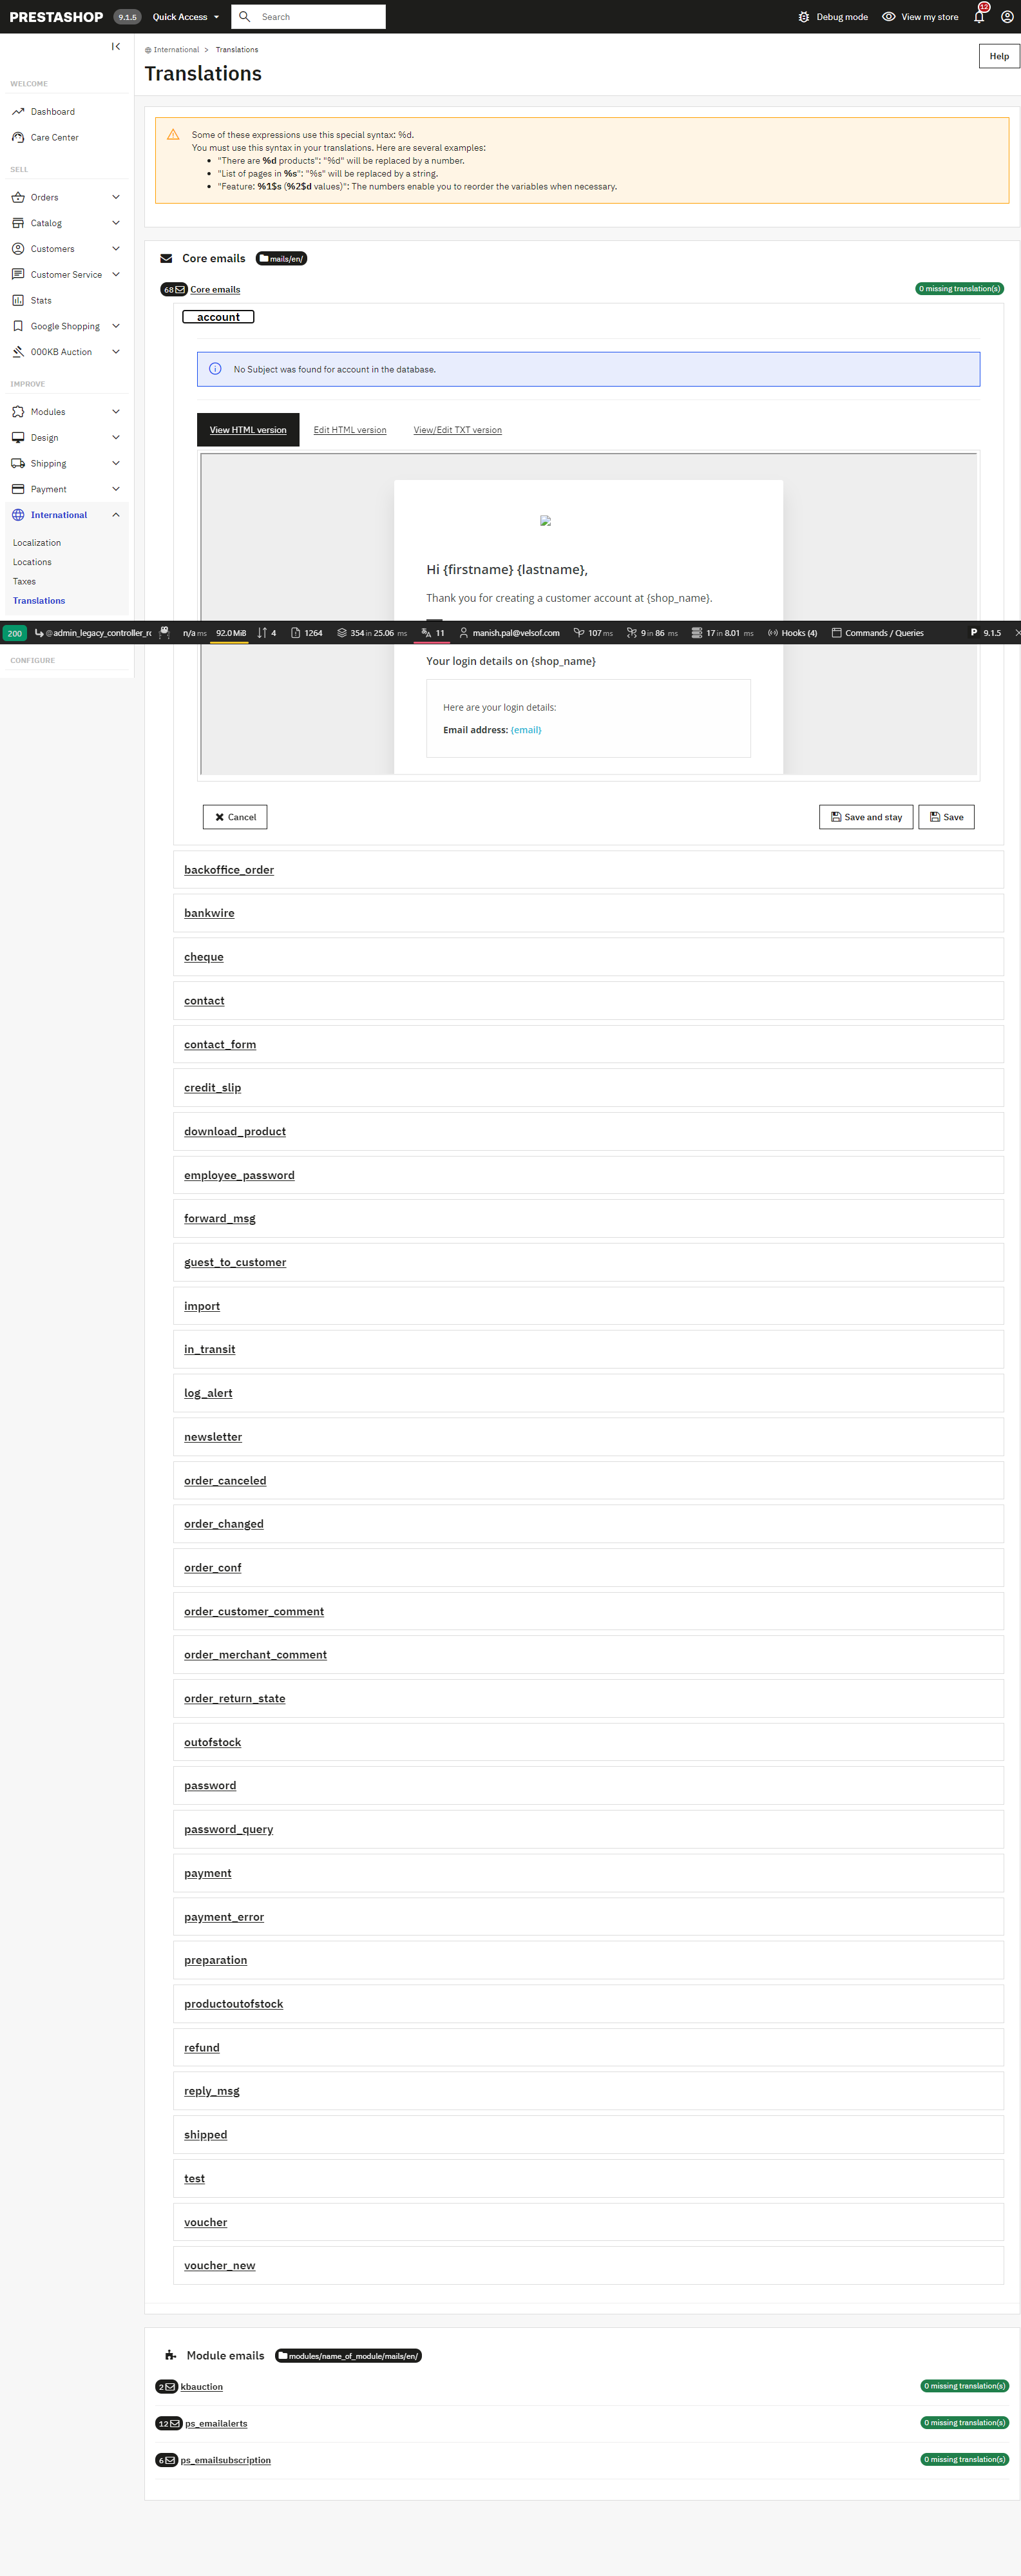
Core emails list expanded, showing individual template names
Full list of core email templates available for translation
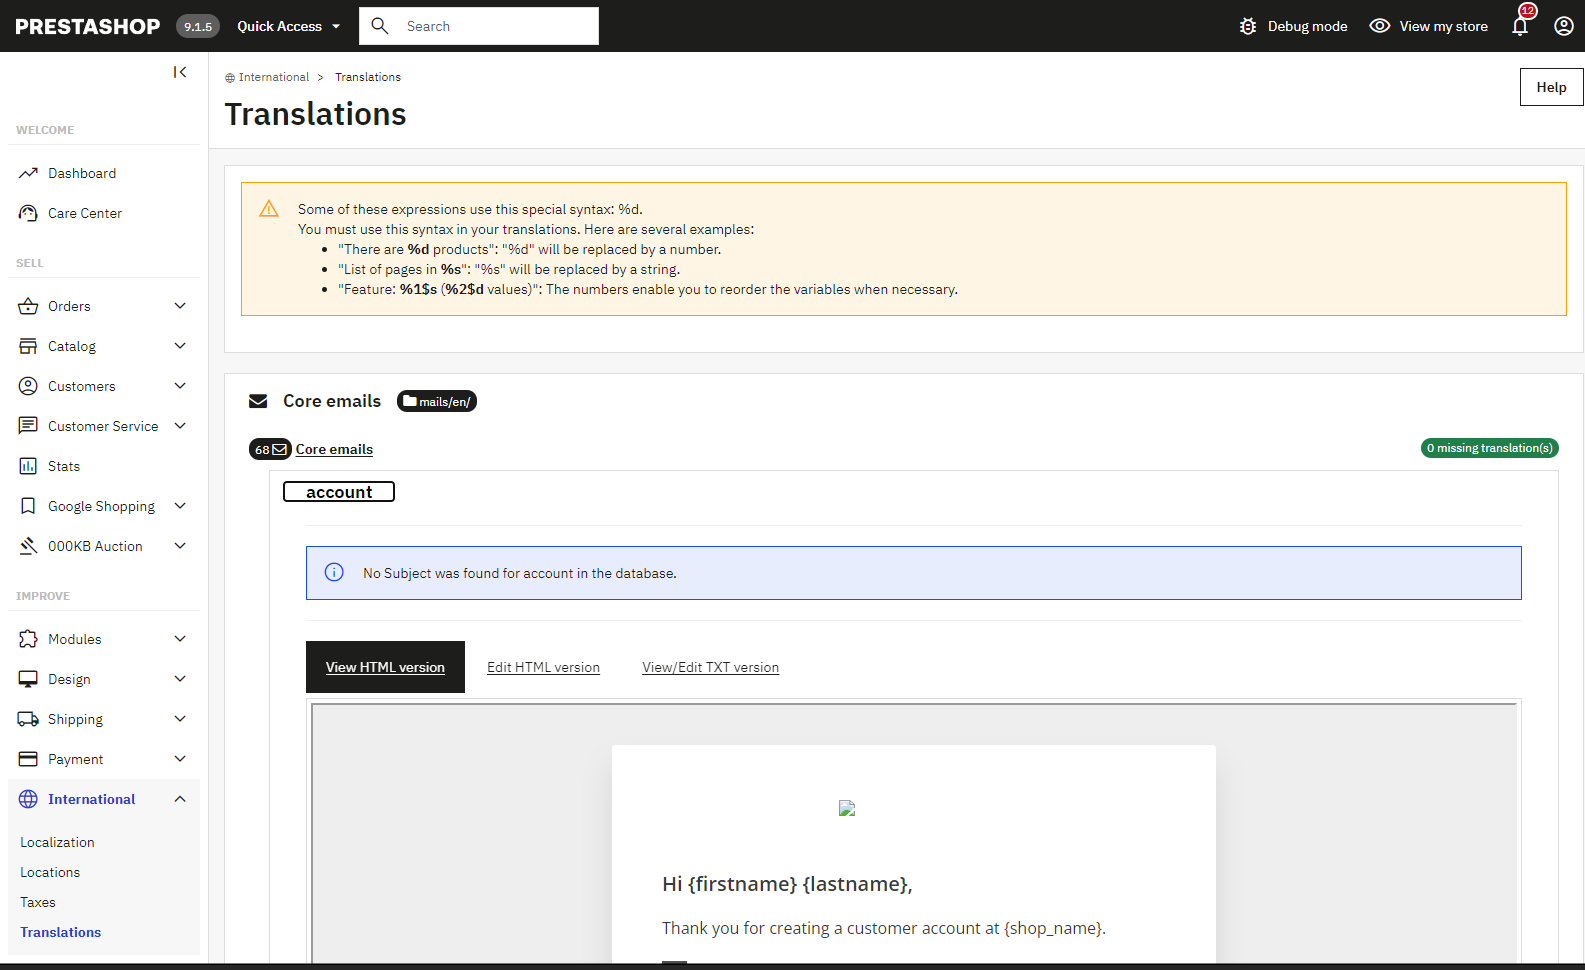
The account template selected, with View HTML / Edit HTML / View/Edit TXT tabs
Once you do that, you will see three options: a preview of the HTML version, an editable HTML version that lets you switch to source code if you want to skip the WYSIWYG editor, and a plaintext version.
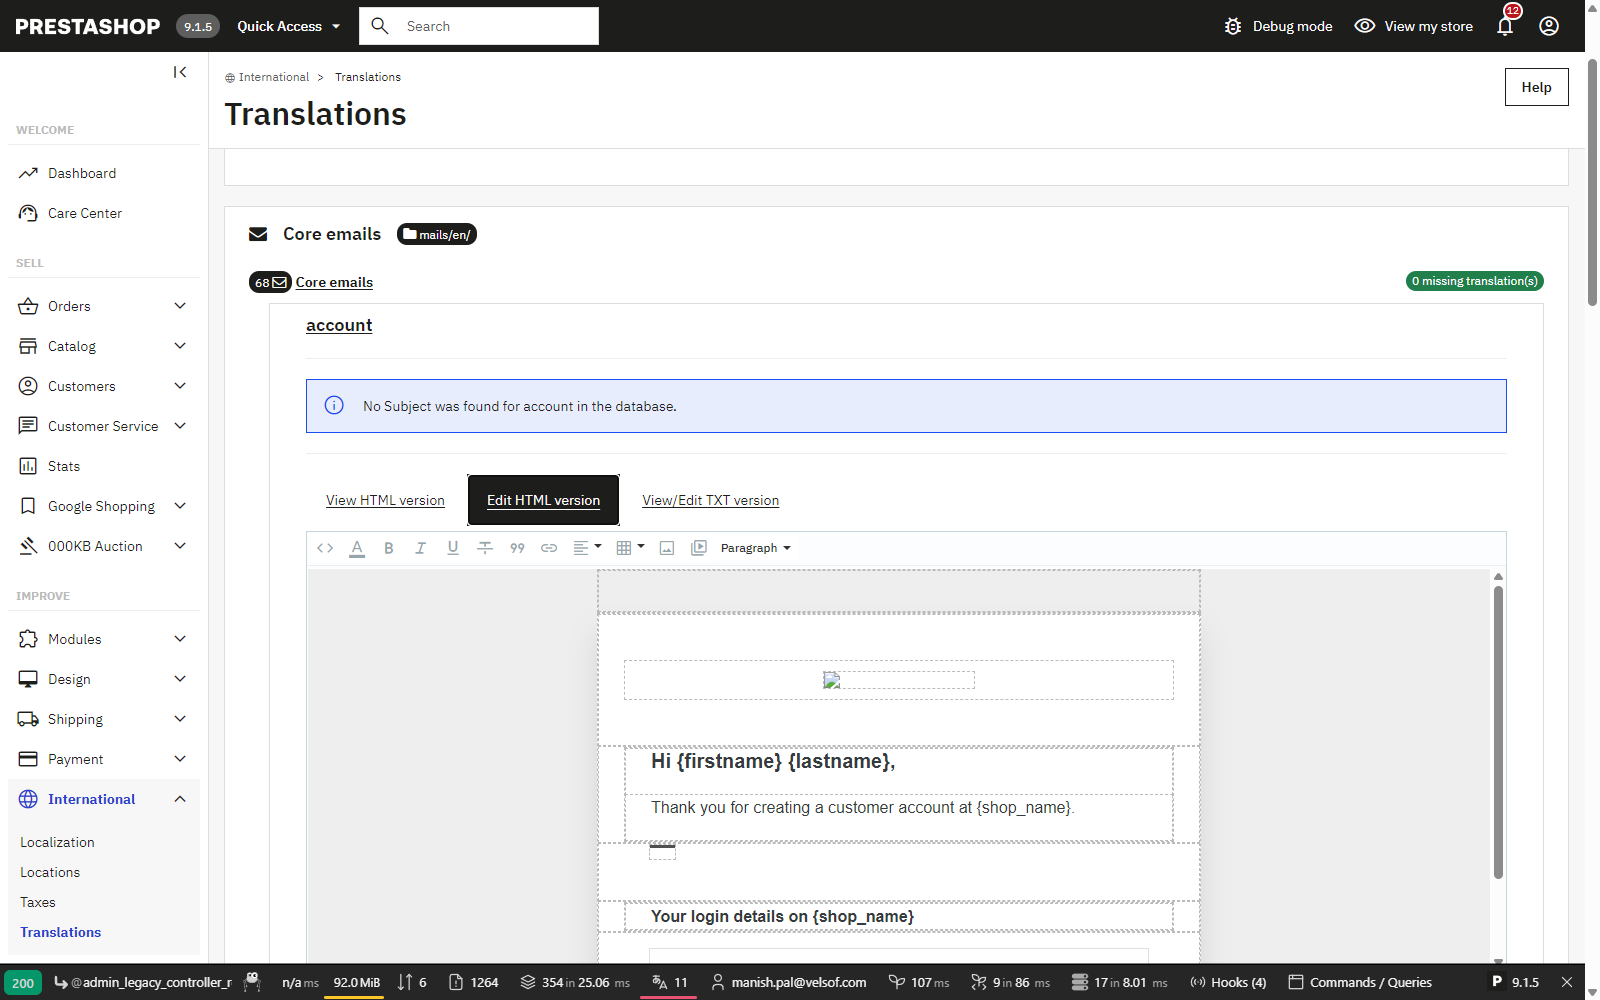
Modify the HTML version of the email message using the built-in WYSIWYG editor
Modify both the HTML and plain text version each time, since some email clients and some users with disabled images only read the text version. Skipping it means half your audience gets an email that doesn’t match the branded one you just built.
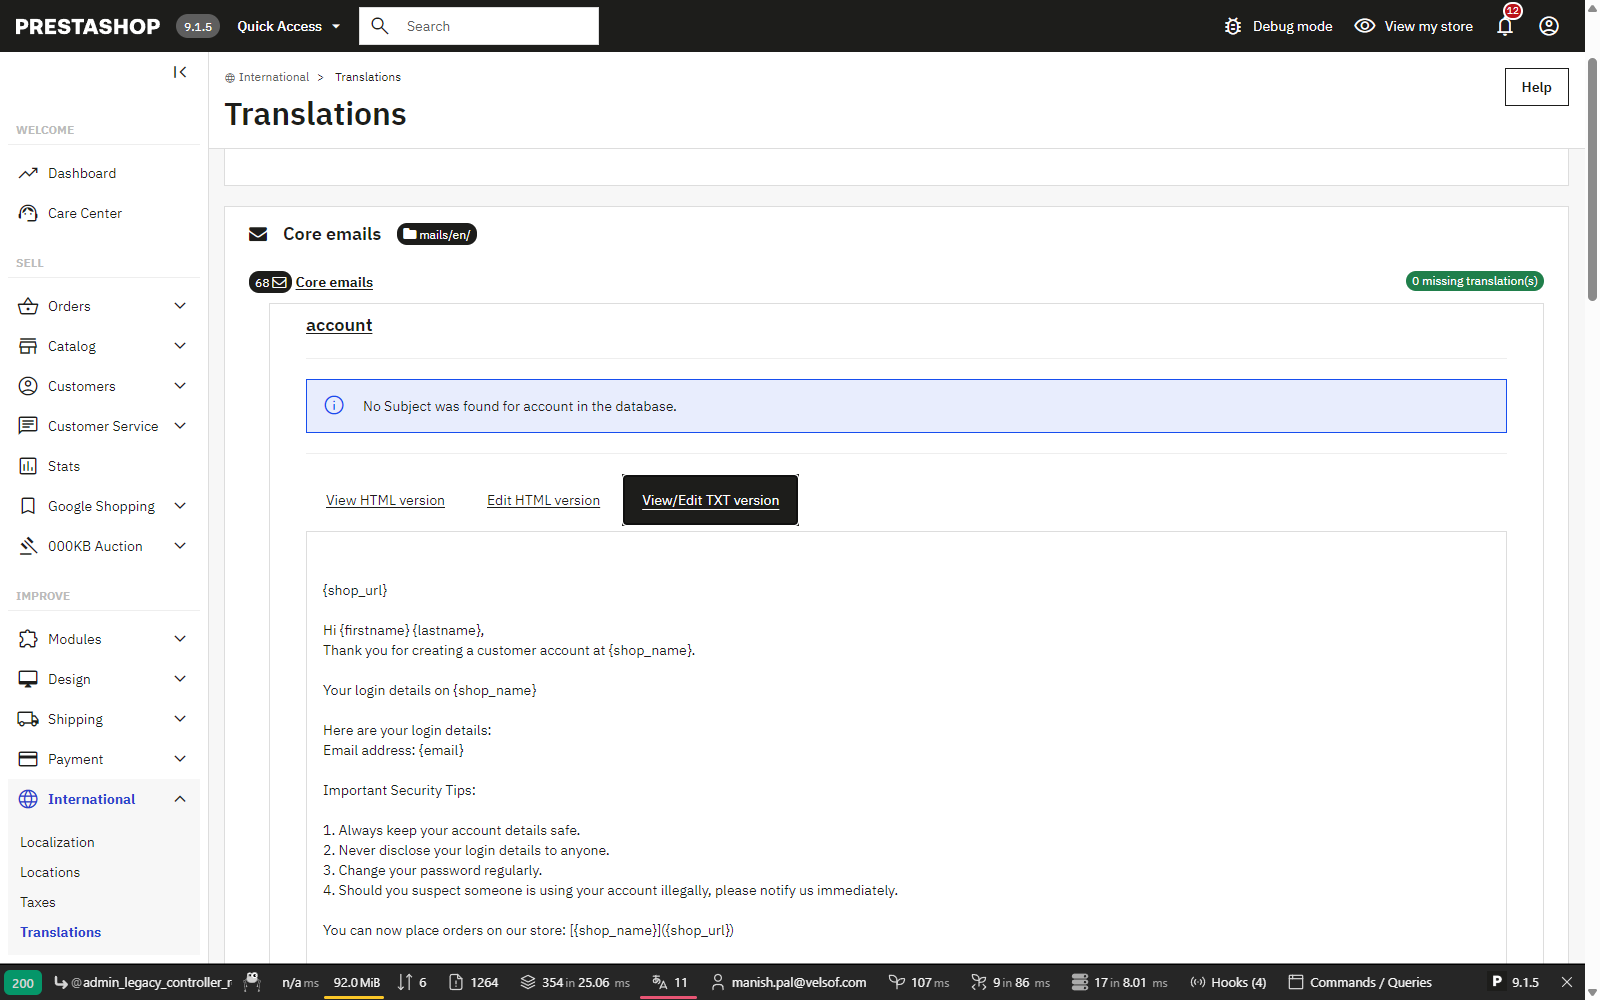
View/Edit TXT version of the account email template
If you prefer to work with files, the same templates can be accessed via FTP or SFTP inside the mails folder. The folder is organized by language. Editing the account.html file there and uploading it again has the same result as using the backoffice editor.
We notice there is no safety net from the WYSIWYG tool. Any little error in Smarty or Twig tags in the template code will result in the failure of the rendering process. In my opinion, testing any modifications you have made through FTP on the staging site of your store is really crucial. A practical note that people often find confusing is that template edits are specific to the theme and the language. If your store runs a custom theme and you edited “Core (no theme selected),” your live emails may keep using whatever the theme itself overrides. Always confirm which theme is actually active before assuming an edit didn’t take effect; this single detail is responsible for a large share of “my changes aren’t showing up” support threads. There is another detail. On PrestaShop 8.x, if the store uses the Twig‑based email theme instead of the classic template system, the emails may not appear in the Translations screen at all. Check the menu path Improve > Design > Email Theme for a translation option before you assume that the classic screen contains every email the store sends. First, inspect the menu again on PrestaShop because PrestaShop is constantly moving the location of email handling as it updates to Symfony.
If a theme overrides mail templates, those files will be located in the folder themes/<themename>/mails/<language>/, which follows the folder layout as the core mails/ directory. A file named account.html placed in that location will be used of the one in the core mails/ directory for stores that use that theme.
It’s the same override mechanism themes already use for storefront templates, just applied to email.
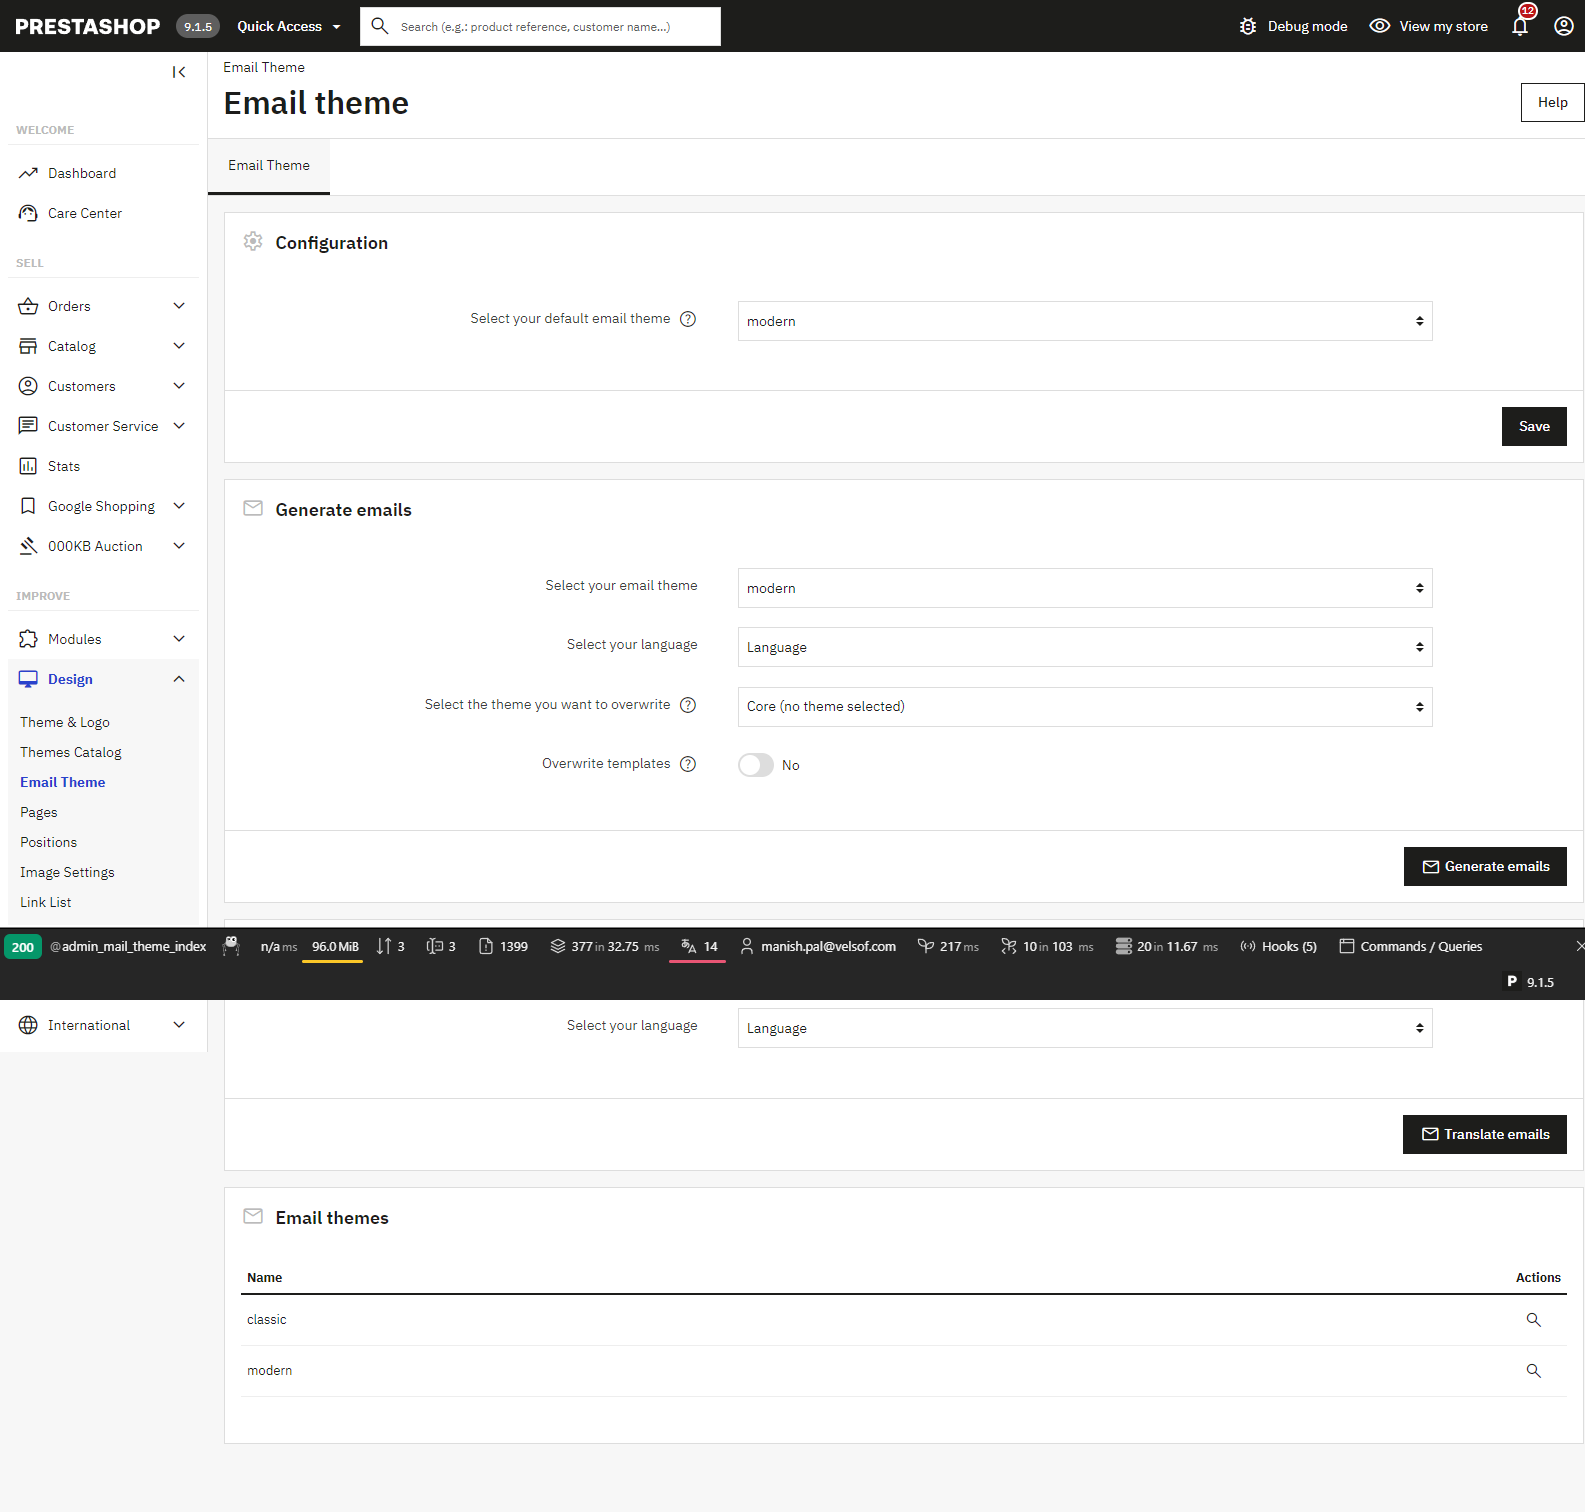
Design > Email Theme in PrestaShop 9.x, showing the Generate emails and Translate emails options for Twig-based email themes
2.0 Common Editing Mistakes Worth Avoiding
A few patterns show up repeatedly when store owners start customizing templates on their own:
- Editing only the HTML version. The text version doesn’t inherit changes automatically, and this kind of TXT/HTML template desync after a translation update is a commonly reported pattern in PrestaShop’s issue tracker, even without a single canonical bug report to point to.
- Deleting template variables can happen by accident. The tags like {firstname}, {order_name} or {id_order} are placeholders and will be filled in by the email generation script while the email is being sent. However, if the HTML code around the template variable gets changed, then the variable can become useless. Stop working properly. Tags may not work. Disappear or appear literally in the email instead of being resolved.
- Not clearing the cache after an edit can cause problems. PrestaShop generates templates, and a cache being outdated is the most frequent cause of an email not displaying after being edited and tested. You should clean it from the back office under Advanced Parameters > Performance section since it’s the cache of Smarty template that is refreshed there; bin/console cache: clear command cleans another cache in Symfony framework and cannot be used as a replacement. The same rule works with overridden theme templates as well: a theme providing its own email templates within themes/<themename>/mails/ folder generates and caches them as PrestaShop does, so your changes won’t show up until you clear that cache as well.
- Assuming that subject‑line edits are located in the same place as body edits is a mistake. The subject line is a dropdown selection in the Translations screen, and it is easy to miss on a first pass.
- Testing in a browser or in an inbox can be misleading. The back‑office preview displays the email inside the admin theme’s CSS context. This applies to real mail client software like Gmail, Outlook, or Apple Mail, which has limited CSS functionality. What seems good in the preview may become a mess after sending the email.
- Now the second layer appears. You might want to let customers know when a backordered item comes back in stock. You could set up an alert for your warehouse team whenever an order has a fragile item flag. Now there isn’t a PrestaShop template that does either of these things. Because there is no existing trigger for that PrestaShop template either.
None of these are exotic problems. Templates are the reason that the phrase ‘edit the template, save and move on’ often turns into an hour-long debugging session.
3.0 When Editing a Template Isn’t Enough
This is where the second layer matters a lot. For instance, you might need to inform your customers when the products they have ordered become available even though they were out of stock. You could want to let warehouse workers know when an order has something that breaks easily. PrestaShop does not have pre‑made messages for these kinds of alerts because there is no signal for these situations.
This is a logic problem, not a template problem. It needs to be solved at the module level.
PrestaShop’s module system exposes hooks event points in the codebase that modules can attach custom code to, and several of them fire around order and customer lifecycle events (actionOrderStatusUpdate and actionOrderStatusPostUpdate for order status changes, actionCustomerAccountAdd for account creation, and so on). A module built to handle a custom transactional email typically does two things:
- Listens for the triggering hook. For a restock notification, that might mean hooking into stock quantity updates. For an order status-based email, it means reacting to the actionOrderStatusUpdate hook, which fires just before the new status is persisted, or actionOrderStatusPostUpdate, which fires just after, and the two aren’t interchangeable, since code hooked into the first won’t yet see the new status saved to the database.
- Calls Mail::Send() with a new template. Rather than repurposing an existing template file, a well-built custom email defines its own HTML/TXT pair placed either in the module’s own mails subfolder or added to the shop’s language folder and passes it the specific variables the new template needs.
PrestaShop provides several mail hooks, but each serves a different purpose. Choosing the right one keeps your module lightweight and avoids unnecessary Mail class overrides.
3.1 actionEmailSendBefore
This is the best hook for changing the email’s main data before delivery. It works with the recipient, subject, template variables, and allows you to prevent the email from being sent entirely.
Use it whenever your requirement affects what the email sends rather than how the final body looks.
Example: Change the recipient and subject
public function hookActionEmailSendBefore($params)
{
    // Redirect email during testing
    $params['to'] = '[email protected]';

    // Update subject
    $params['subject'] = '[TEST] ' . $params['subject'];
}

Example: Cancel an email conditionally

public function hookActionEmailSendBefore($params)
{
    if ($params['template'] === 'order_conf') {
        return false; // Stop sending this email
    }
}
3.2 actionEmailAddBeforeContent
Use this hook when you only need to add content before the generated HTML or TXT email body. It works well for notices that should show up at the top of many transactional emails. The original email template stays exactly as it is.
The original email template remains untouched.
Example: Add a notice above the email content
public function hookActionEmailAddBeforeContent($params)
{
    return '<p><strong>Important:</strong> Please keep this email for your records.</p>';
}
3.3 actionEmailAddAfterContent
This hook works similarly to the previous one, except the content is appended after the generated email body.
Use it for information that naturally belongs in the footer area.
Example: Append support information
public function hookActionEmailAddAfterContent($params)
{
    return '<hr>
    <p>Need help? Contact our support team anytime.</p>';
}
3.4 actionMailAlterMessageBeforeSend
This hook is intended for advanced customization. Instead of modifying template data, it gives access to the final message object immediately before delivery.
Choose this hook when your requirement involves the mail object itself rather than the template content.
Example: Add a custom mail header
public function hookActionMailAlterMessageBeforeSend($params)
{
    /** @var \Symfony\Component\Mime\Email $message */
    $message = $params['message'];

    $message>getHeaders()>addTextHeader(
        'XModuleSource',
        'My Custom Module'
    );
}
3.5 Quick decision guide
As a practical rule, always start with actionEmailSendBefore for business logic, use the content hooks for simple body injection, and reserve actionMailAlterMessageBeforeSend for advanced message-level customization. This approach keeps your module compatible with PrestaShop’s core mail system without requiring overrides.
For cases the native hooks above don’t cover, some third-party modules go a step further: rather than every module separately overriding PrestaShop’s core Mail class, a module like prestashopmailhook performs that override once and reexposes it as its own hook, actionMailSend, which still fires every time any mail is sent through the system, successful or not. It’s worth being clear that this is still an override of the core Mail class, carrying the same upgrade fragility risk described above. Its real benefit is that other modules can inspect or modify a mail message, swap the sending backend, add custom variables, or suppress a message under conditions all by reacting to the same hook instead of each one overriding Mail independently, which is what actually causes modules to fight over the same file. Before installing a module like this, check its ps_versions_compliancy against your PrestaShop version, since an unmaintained Mail override is exactly the kind of override this article warns about above.
3.6 A Practical Example: OrderStatusTriggered Custom Email
Say you want to email a customer a personalized “thank you plus care instructions” message specifically when an order tied to a certain product category ships something the default shipping confirmation template can’t do, since it’s not aware of product categories.
The practical shape of that solution looks like this:
- A small custom module registers on the actionOrderStatusUpdate (or actionOrderStatusPostUpdate) hook.
- Inside the hook method, the module checks whether the order contains a product from the relevant category and tracks which orders it has already emailed, since this hook can fire more than once for the same status transition in some flows, and a customer getting the same “thank you” twice reads as a bug.
- If it matches, the module loads its own template pair (not the core shipping template) and calls the mail-sending method with order-specific variables customer name, product name, tracking link escaping any customer-supplied value before it lands in the HTML template, since an unescaped variable is a real opening for stored content injection.
- The main shipping confirmation email still goes out as usual; this is another email added on top.
This is very different from changing the shipping template because altering that template would send the message to all shipped orders, not just the ones you want.
Knowband’s Loyalty Points module (kbloyaltypoints) is a real, shipping example of exactly this pattern. It registers on actionOrderStatusUpdate, and each loyalty rule you configure defines its own condition (for example, a minimum cart total) plus its own notification email. When an order’s status changes to one of the statuses configured under the module’s General Settings as “awarded” or “cancelled,” the hook fires, checks the order against the matching rule, and if it qualifies sends the rule’s own notification email (built with the module’s own subject line and WYSIWYG template, not the core order-status template) to tell the customer their loyalty points were earned or reversed.
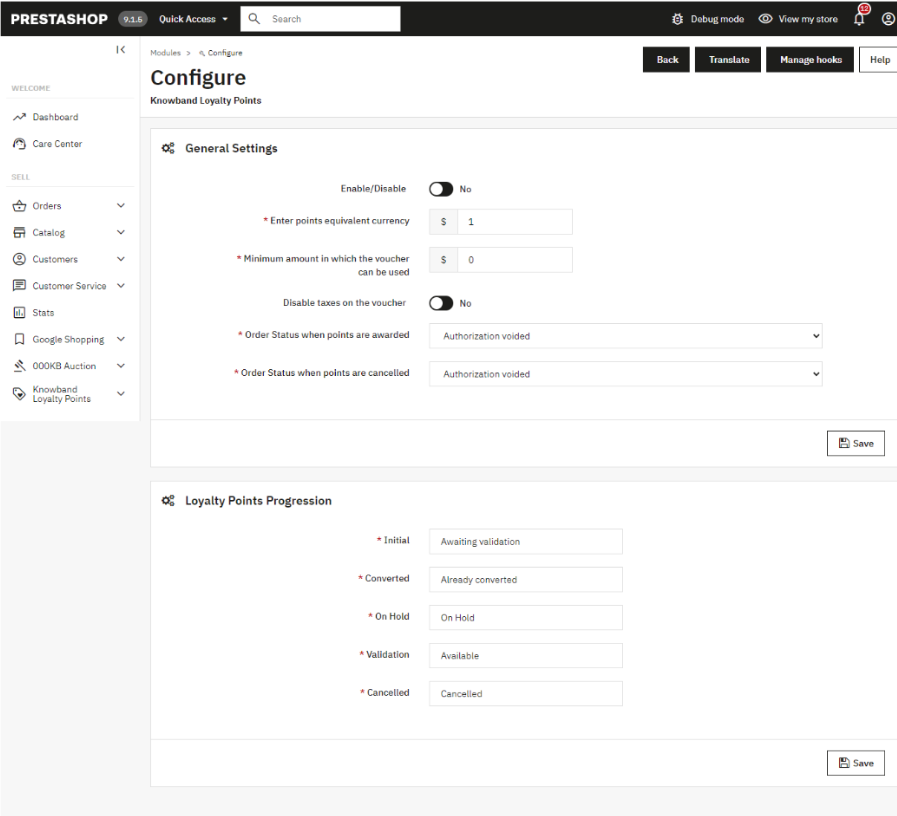
Loyalty Points module General Settings, where the order statuses that trigger point award/cancellation are configured.
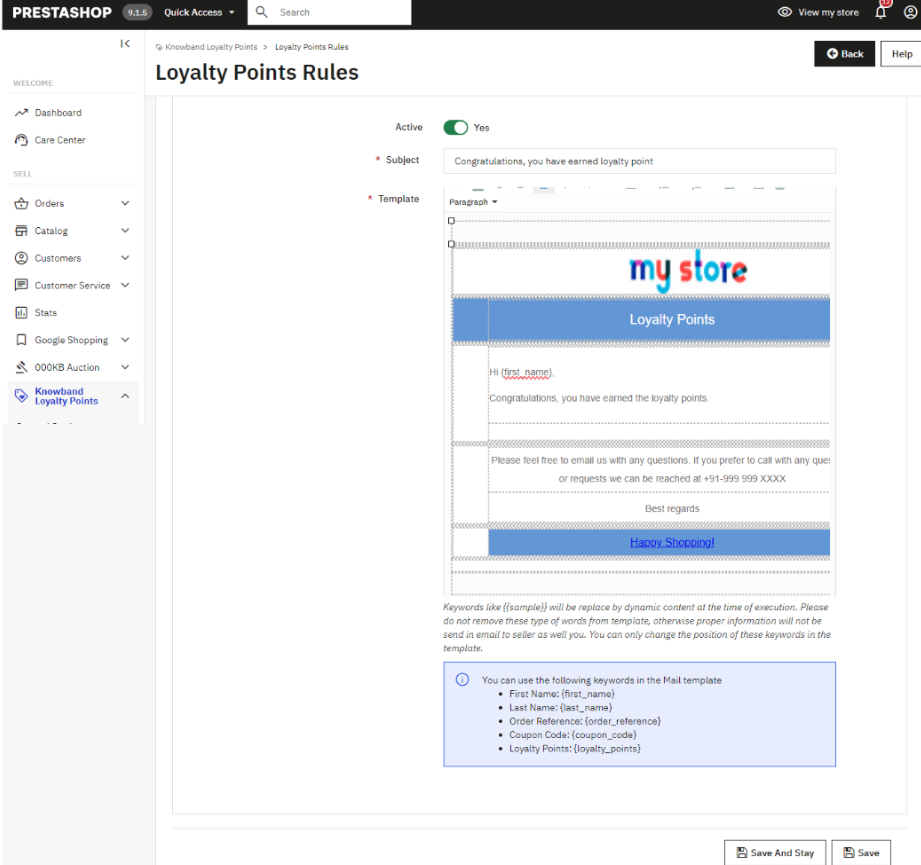
The rule’s own Notifications tab template is the actual email sent to the customer when the order-status hook awards their loyalty points.
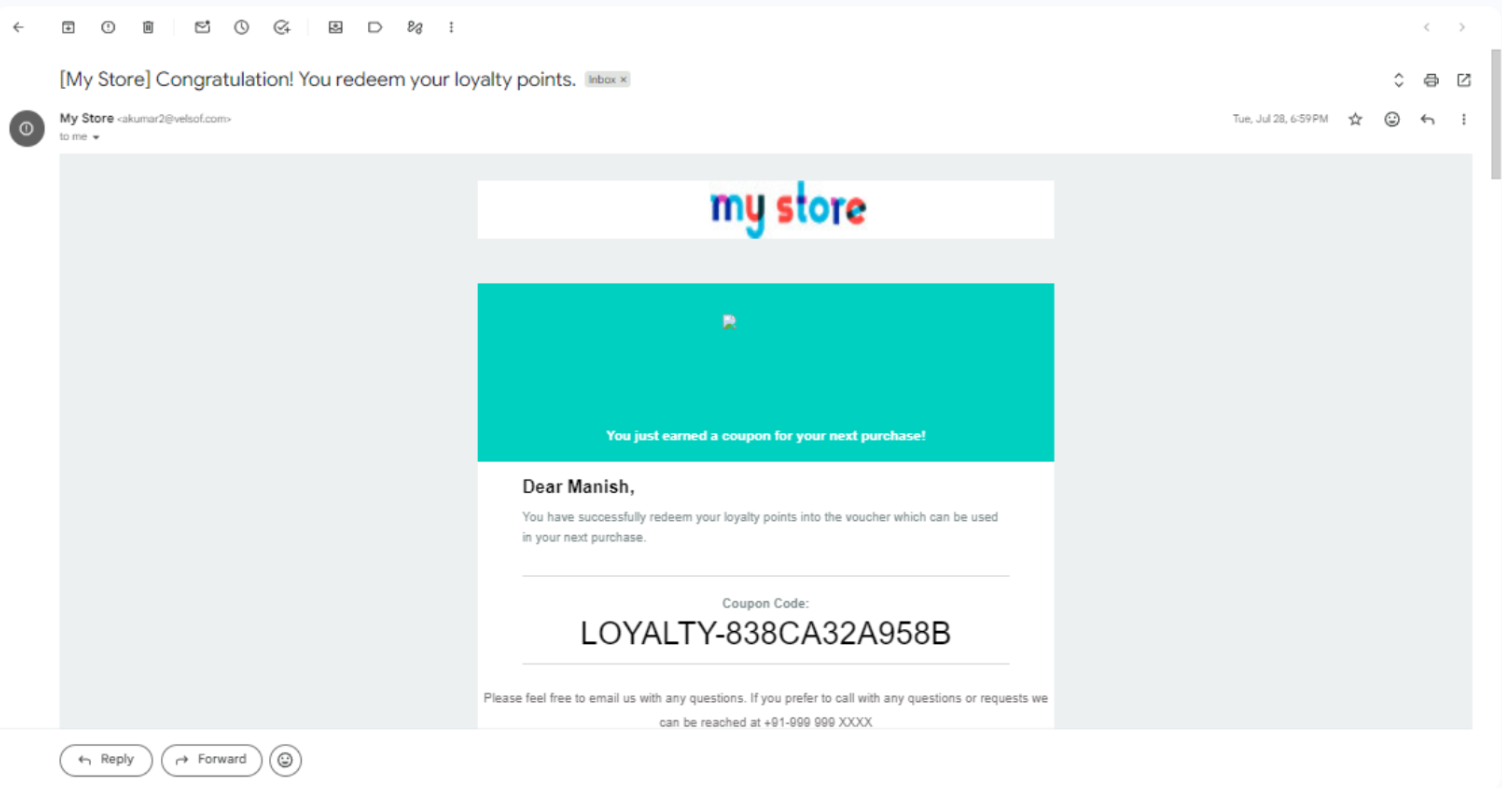
What the customer actually receives in their inbox once the hook fires and the rule’s notification email is sent.
See the module itself here: Knowband Loyalty Points Module
4.0 Deciding Which Approach You Actually Need
Before starting any customization work, it’s worth running through a short decision check:
- Just want different wording, colors, or a logo on an existing email? Stay in the Translations screen. No code required.
- Want the email to look meaningfully different a new layout, different structure, brand-consistent design system across every transactional email? You’re still editing template files, but plan to redesign the HTML/TXT pair properly (ideally table-based HTML for email client compatibility) rather than patching the default one piece by piece.
- Want a new email that doesn’t currently exist, or want an existing email to fire under new conditions? This requires a module with hook logic; the template layer alone can’t do it.
- Managing many templates across multiple stores or languages and don’t want to hand-edit each one? This is where a dedicated email template management module or prebuilt template pack earns its cost, since it typically handles multi-store and multi-language syncing that the default screen makes tedious.
- Building something reusable across projects, like a shared library of transactional email logic? That points toward writing a small internal SDK or helper library rather than duplicating Mail::Send() calls across multiple modules.
5.0 A Quick Pre-Launch Checklist
Before pushing any email customization live, run through this:
- Both HTML and TXT versions updated and saved
- Correct theme selected when editing (not just “Core” by default)
- All template variables intact and rendering correctly in a test send
- Cache cleared after the edit
- Test send checked in at least two real inboxes (not just the admin preview)
- Subject line edited separately, if it needed to change
- For custom logic: hook confirmed to fire only under the intended condition, not on every order
- SMTP settings verified under Advanced Parameters > Email, so the test isn’t masking a delivery problem
One gotcha worth calling out on its own: PrestaShop’s mail log records that Mail::Send() was called and handed off it isn’t proof the message reached an inbox. Having a wrong SMTP host, port, or credentials at Advanced Parameters > Email will make each of these emails appear to be sent in this log without anything being sent out of the server. After modifying any mail server settings, always verify the actual delivery of emails to a real inbox.
6.0 Getting the Foundations Right
Transactional emails are much more important than what most store owners think of them; they are one of the very few forms of correspondence customers actually read, since they are expecting their order or account details. An unbranded generic email template does not quite help with maintaining this customer’s trust. However, the solution may not always come from editing the HTML; sometimes translations need a five-minute tweak, and other times the small module needs to know when this email should even be generated.
If you have just started working on your project, then you should not be trying to do two things at once. First, you will have to fix your templates as this itself will make your store look very professional and then you can move to create custom logic-based hooks if you have an actual case for that like mentioned above.
7.0 The short version
Every PrestaShop email carries two separate problems: how it looks, and when it fires. Editing a template only ever solves the first one.
Cosmetic changes belong in the Translations screen no code needed. A brand-new notification, or an existing email that needs to fire under new conditions, needs a module hooking into a PrestaShop event and calling Mail::Send() itself.
Before building a full module, PrestaShop’s own mail hooks actionEmailSendBefore and its siblings can already rewrite, extend, or cancel a send with no Mail class override required.
One more thing worth remembering: a “sent” entry in the mail log only means Mail::Send() was called, not that the message reached an inbox. Always confirm delivery for real.
Thanks for reading.
If you have questions or need assistance with your website performance or migration, our experts are here to help. Contact the Knowband team at [email protected] today for reliable eCommerce plugins tailored to your eCommerce needs.


